How to retouch skin on Lightroom?

Today, Lightroom is developing and be supportive for photography. Besides calibrating the light, color, tone, and processing of multiple images at once, this is important in Photoshop. Photoshop when post-photo. Although there are no great tools like Photoshop to retouch photos or produce advanced effects, Lightroom still has enough brush and spot removal tools to help you with facial retouching, smoothing the skin pretty well without having to switch back and forth between Lightroom and Photoshop.
In this tutorial, I use this stock, you can save on or use.

And here is the result for you to compare

STEP 1: SPOT REMOVAL
In this article, I use two tools of Lightroom is Spot Removal and Brush. First, I will use Spot Removal to clear the acne, blemishes then use the brush to smooth the skin. You can follow this:

In the panel of Spot Removal, select Heal instead of Clone

The size of the brush depends on the image and your purpose, while Feather to 0 and Opacity is 100%.
With this tool, Lightroom will process the area that you clicked to replace with another nearby area. You just need to drag the acne area, click, automatically it will be replaced with the area in the circle number 2, if you do not want to select this area, you can move the circle 2 and go to the area you want.


You repeat that step until you fix all the blemishes, here we temporarily get results like this

STEP 2: USING ADJUSTMENT BRUSH
After cleaning skin or acne, we will use Brush to smooth the skin, you select the Brush tool as shown:

With the parameters in the Brush tool, which areas are highlighted, it will be influenced by those parameters. Here you just smooth skin, so you adjust parameters as follows:
- Clarity: -100
- Sharpness: -30
- Noise: +50

- With the Feather parameter of the Brush, if you select 0 then your brush stroke is very sharp, and 100 is very blurry, so here I recommend you use about 75.
- After that, you brush on the skin to smooth, you can press the O key to display the red mask, to help you know the painted area.

- If you overdo, you can hold Alt (on Win) or Option (on Mac) and fill to clear it.
- At the same time, you can press the O key to turn the red area on or off during the process.

And finally, we can get the following results:

Hope you like this article and wish you success.
YOU MIGHT ALSO LIKE...
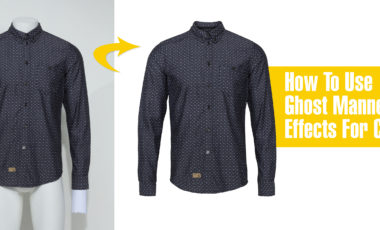
How To Use Ghost Mannequin Photography Effects For Clothing
If you’re in the apparel business, you’ve faced the challenge of demonstrating a product’s fit without breaking the bank or distracting your customer. Customers need…
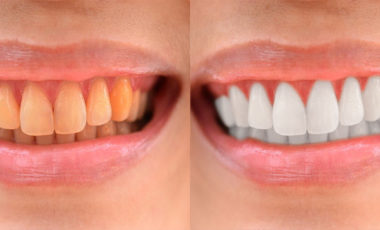
How to Whiten Teeth in Photoshop?
In this tutorial, we will learn basic steps to whiten teeth. Using Pen tool with Color Balance and Levels, you will have a perfect picture.…
Why should you choose the professional photo retouching services?
Retouch, the word you may hear so many times in today photography on your TV, magazines, or people around you. But have you ever try to…

10 amazing online photo editor apps
With the need for basic image editing, the following apps will please you. If you just need to edit some simple things, using professional programs…
Recent Post

How To Use Ghost Mannequin Photography Effects For Clothing
Posted on November 15, 2017

How to Whiten Teeth in Photoshop?
Posted on November 4, 2017

Why should you choose the professional photo retouching services?
Posted on September 13, 2017

10 amazing online photo editor apps
Posted on September 13, 2017

Top ten well-known photographers in the world
Posted on September 12, 2017
Leave a Reply