10 common habits you should break when working in Photoshop

Photoshop is incredibly cool and interesting software because of the variety of functions inside. And that diversity also makes us feel confused in finding the best way. Therefore, we will mention the 10 common mistakes that everyone should avoid to use Photoshop more efficiently.
1 / Working on the same layer
Whether you retouch or anything else, I always recommend that you should work on different layers instead of using every effect for only one layer. The biggest problem here when working on a single layer is that you can not flexible return to the previous steps in case you want to edit them. So in order to save time and effort, we should set the habit of creating a new layer for each effect, naming them for the future search and editing to save time.
2) Using of Delete button and Eraser tool instead of using Mask
This is a bad habit that almost everyone has. Delete and Eraser Tool are the two most negative ways of using photoshop as they will completely erase the content you chose, making it very difficult to edit later, so I recommend you take full advantage of 3 functions below.
- Pixel Mask
- Vector Mask
- Clipping Mask
The way to hide unwanted content is to use a mask. This way, we can edit, change our minds at any time and save time.
3 / Not use hot key
Not using a hotkey when working with Photoshop just like eating soup with a plate. We can enjoy the soup, but it will take more time rather than using a spoon. A real Photoshop user is a mouse user and the other hand is to dance on the “field” of the keyboard. And for anyone who wants to become a “keyboard hero” in the right sense, we will list some of the hot keys here.
- Cmd / Ctrl + T – Free Transform
- Cmd / Ctrl + S – Save
- Cmd / Ctrl + A – Select all
- Cmd / Ctrl + D – Deselect
- Cmd / Ctrl + I – Invert colors
- Cmd / Ctrl + Shift + I – Invert selection
- Cmd / Ctrl + click on the layer’s thumbnail – Create a selection based on that layer.
- Cmd / Ctrl + Option / Alt + A – Select all layers
Option / Alt + click between two layers – Clipping Mask
- Cmd / Ctrl + G – Group Layers
- Cmd / Ctrl + Shift + G – Ungroup Layers

4 / Rastering to Pixel layer
Most of us have ever heard the Smart Object in photoshop but not everyone uses and understands their uses. The Smart Object appeared very early, Photoshop CS2 and thanks to that we can comfortably transform Smart Object as many times as we like, but still, retain the image quality rather than the normal Pixel layer. To explain this, you have to understand that when you move from a normal layer to a smart object, Photoshop will export that layer to a completely separate image file and use that file for all changes (scale, reflect, rotate, …)
When working with photoshop, we can not know in advance how many layers to transform and if we do not know the use of the Smart Object, our photo will lose sharpness. So, please do not hurry to rasterize layer.
5 / Not use Adjustment layer
This is no different than working on the same layer. If we choose Adjustment from the Image tab on the menu bar then you have unintentionally applied the effect you used on the selected layer and the worst of it is that you will not have a chance to edit them later. To avoid this time-consuming and troublesome problem, select “Adjustment” from the Window tab, a right-hand pane will appear for you to select the desired effect.
The interesting thing is that when you have selected the effect you want to use, Photoshop will create a completely separate adjustment layer, but unfortunately, that effect will be applied to the entire layer below. You can completely avoid this by doing the same thing as the Clipping Mask, which is using the Option / Alt + Button. Click on the Adjustment layer and the layer you want to apply the effect (Adjustment layer must be on the layer you want to apply). So that effect will only be applied to the selected layer.
6 / Mesy layout
As a regular user of Photoshop, it is very important that we arrange the layers in an organized, logical way. If you’ve fixed the first habit above then this will be the next thing you should know. Maybe at first, you will find that editing the name, color for each layer is time-consuming but trust me, if you are making a relatively long and complicated product then it will help you save a mount of time. Also, when you deliver a design file to your customers or other team members, it is better to clearly label each layer or group to make it more convenient.
7 / Not use Smart Filter
Smart Filter is different from the normal filter. Smart Filter allows you to hide or show the effect selected, in addition, to customize the details within the effect and apply blend mode that the normal filter can not. This is quite similar to using Adjustment layer?
8 / Moving the view in the workspace
To move the view in the workspace, many still use two sliders instead of the Hand tool or Space bar. This is quite inconvenient and time consuming when working in photoshop. I will list some hot keys so that you can find easier to move the view up and down, back and forward.
- Space – Hand tool
- Z + drag the mouse left, right – Zoom in and out
- Hold H + click- General view
- Cmd / Control + 0 – Fit to Screen
- Cmd / Control + 1 – Back zoom 100%
9 / Not use Adobe Bridge
Adobe Bridge has been available in Photoshop CS2. This is software that supports other Adobe products in file management. If you are used to Bridge, you will find their convenience. In addition, Bridge also has the function of comparing two images, focus on any part of the picture.
10 / Not save files regularly
What is worse when it is about to be finished, the software or power off, “blue screen”? To avoid suppressed situations, you should always save the file continuously. The cmd/ctrl + S key combination only takes about 1 second.
YOU MIGHT ALSO LIKE...
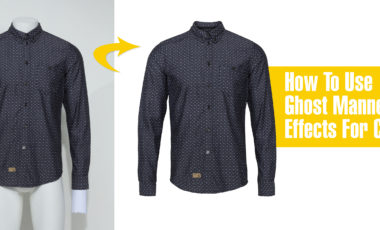
How To Use Ghost Mannequin Photography Effects For Clothing
If you’re in the apparel business, you’ve faced the challenge of demonstrating a product’s fit without breaking the bank or distracting your customer. Customers need…
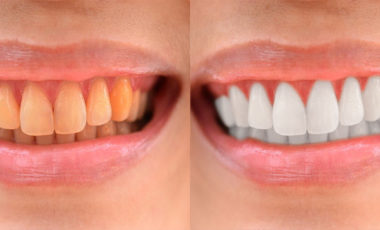
How to Whiten Teeth in Photoshop?
In this tutorial, we will learn basic steps to whiten teeth. Using Pen tool with Color Balance and Levels, you will have a perfect picture.…

Why should you choose the professional photo retouching services?
Retouch, the word you may hear so many times in today photography on your TV, magazines, or people around you. But have you ever try to…

10 amazing online photo editor apps
With the need for basic image editing, the following apps will please you. If you just need to edit some simple things, using professional programs…
Recent Post

How To Use Ghost Mannequin Photography Effects For Clothing
Posted on November 15, 2017

How to Whiten Teeth in Photoshop?
Posted on November 4, 2017

Why should you choose the professional photo retouching services?
Posted on September 13, 2017

10 amazing online photo editor apps
Posted on September 13, 2017

Top ten well-known photographers in the world
Posted on September 12, 2017
Leave a Reply