Retouch face professionally with Healing and Dodge & Burn

Learning how to use Healing and Dodge & Burn is essential to create professional, high-quality retouched photos.
In this tutorial, we will learn two basic steps in professional photo retouching: Healing and Dodge & Burn. Based on these two methods, plus the tinge and patience, you can create perfect photos like ones in fashion magazines or advertisements.
Some things to keep in mind when retouching pictures:
Try to keep as many original textures as possible; This also means using a small size brush, and stay away from the Blur tutorial on a large piece of skin.
Develop the skills to identify where the defect is. Some features such as moles, freckles are not always blemishes in all cases; you must be careful when retouching these features, as this may ruin identity, the spirit of the subject and the image.
Be careful and know when the to stop. Avoid overly-retouched situations that can make the subject perfect and unrealistic.
If you want to professionally retouch photos for photographers, respect their ideas. Keep in mind that the choices about models, costumes, backgrounds, lighting, etc. They all contain the photographer’s own intent; Try to feel the intention of the photographer and not change much unless asked. Good retouching work is when the viewer can not realize that the photo has been retouched.
Guide:
The original image used for this example:

Always start with high-resolution images. You can go to professional photo forums to ask for the original photo (if it is a JPG image, try to select a photo> 1mb to ensure quality)
We will start with the first step: Healing. Healing is the operation of sampling a good area on the image and then using that pattern to overpress the blemishes. To do Healing, we will use the Clone Stamp tool
Open the image in Photoshop: go to File -> Open menu. On the Layers window, drag the Background Layer and drop down the New Layer icon in the bottom bar to create a copy of the image. We will work on this newly created layer and leave the original layer unchanged so that we can recover the image any time we need to.
 In this tutorial, the spots below will be retained. However, you always can decide what to keep/ remove, or even move them a bit to improve the overall.
 On the toolbar, select the Clone stamp (or press the C) and zoom the image up to 100%.
 On the selection bar, choose Blend mode to Lighten to remove dark spots, or Darken to remove bright spots. In this way, the Clone tool will retain the “good” texture and only affect on the needed-retouched pixel. Adjust the Size of Brush so that it has the same size as the blemish, and select a Hardness value of less than 90% to avoid creating blurry edges.
Hold down the Alt key and click on the skin whose color matches the serious skin and meets the requirement. Next, press consecutively on blemishes to hide them. Repeat the above two operations for each blemish.
 Zoom the image up to 200% when healing with minor imperfections, including the exposed eyebrows:
 Once you’ve eliminated the major blemishes, you’ll notice the next issue: the shadow and highlight areas on the face that can show off wrinkles, large pores, acne scars, or even uneven skin color due to digital processing, like the lips below:
This is time to move on to the next tool: Dodge & Burn.
The Dodge & Burn(O shortcut) tool is used to adjust the lighting intensity, increase the shadow or highlight of the image with brush strokes. By applying Dodge & Burn, we can make our skin smoother and more perfect without losing the texture- a great important thing in professional photo retouching. If you have ever followed the tutorials that give unwanted results, this will definitely be the useful knowledge that will lead you to higher standards of professionalism.
Instead of using the available Dodge & Burn tools, we will use the Curves adjustment layer to increase the level of control to the maximum.
First, click on the New Fill/Adjustment layer in the bottom bar of the Layers bar and select Curves. On the new Curves window, drag the middle part of the RGB curve.
Double click on the newly-created layer to rename to ‘Dodge’. Click on the mask icon on this layer (white rectangle) and press Ctrl + I to reverse. The mask icon turns black.
 Similarly, create a new Curves Adjustment Layer. This time on the Curves window, drag the middle part of the RGB line down as shown. Rename this layer to ‘Burn’, click on the mask icon on this layer and press Ctrl + I to reverse.
Curves window and the layers as follows
 Select a Soft Brush and the Flow value is about 1-4%. Click on the color box below the toolbar and change the primary color to white (color value: #ffffff).
 Now you will whiten the black masks you created, to reveal the effect underneath the mask
 Click on the Mask icon of Dodge layer and paint the image to brighten the options area. To darken the area, click on the mask icon of the Burn layer and paint with the brush.
For example, to deal with dark areas on the lip, you need to paint white on the Dodge Mask:
 Because the Flow value is only 1%, you will not notice much difference with each Brush stroke; The purpose here is to change the brightness of each area with consecutive and controlled brush strokes. Keep changing between the two Masks of Dodge and Burn layer to highlight or darken the blemishes, until you get a smooth surface.
To better identify the areas that need Dodge or Burn, create an Adjustment Layer Black & White: Click on the New Fill/adjustment layer and select Black & White. On the Black & White window, drag the Red slider towards the left to increase contrast and observe better

 Final result after adjustment:
 This process will take more time in comparison with using Blur tools, but the final result will definitely be worth the effort. The images produced by this method have the high sharpness and will look beautiful even when enlarged for printing.
YOU MIGHT ALSO LIKE...
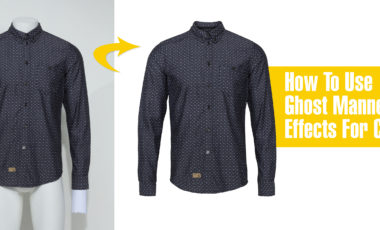
How To Use Ghost Mannequin Photography Effects For Clothing
If you’re in the apparel business, you’ve faced the challenge of demonstrating a product’s fit without breaking the bank or distracting your customer. Customers need…
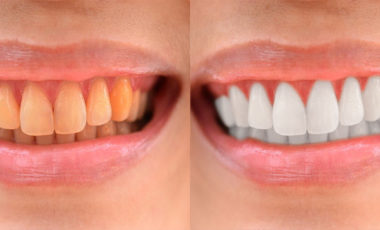
How to Whiten Teeth in Photoshop?
In this tutorial, we will learn basic steps to whiten teeth. Using Pen tool with Color Balance and Levels, you will have a perfect picture.…
Why should you choose the professional photo retouching services?
Retouch, the word you may hear so many times in today photography on your TV, magazines, or people around you. But have you ever try to…

10 amazing online photo editor apps
With the need for basic image editing, the following apps will please you. If you just need to edit some simple things, using professional programs…
Recent Post

How To Use Ghost Mannequin Photography Effects For Clothing
Posted on November 15, 2017

How to Whiten Teeth in Photoshop?
Posted on November 4, 2017

Why should you choose the professional photo retouching services?
Posted on September 13, 2017

10 amazing online photo editor apps
Posted on September 13, 2017

Top ten well-known photographers in the world
Posted on September 12, 2017
Leave a Reply