How to create luscious lips in Photoshop CS6?

For girls, makeup makes them beautiful and attractive than ever. So, when it comes to makeup, we often think of tools such as powder, lipstick, and brushes. However, if I say do not need these tools, I still can make up. It sounds unbelievable, but with Photoshop nothing is impossible.
Learning how to make up in Photoshop is a pretty interesting. If you know how to edit in Photoshop, your pics would be pretty. Either you take photos without the need for making up but if you know how to make up with Photoshop software, the face on the picture also become beautiful immediately. So why do not we learn a little more knowledge about it so that we can retouch our pictures?
Face makeup in Photoshop is no different than in real life. You also have to do every step, every part of the face of it meticulously. So, I will guide in detail about what I consider the most basic things in the face makeup.
Part I: Paint the lipstick in Photoshop
In this tutorial, I will guide you how to paint lipstick so that they will look attractive and as real as possible. You can adjust the lipstick color as you like to fit the face of the model.
Step 1:
Put the image you want to edit in Photoshop, press Ctrl + J to duplicate it to layer 1

Step 2:
Click on the Quick Mask icon located as shown on the picture or press the Q shortcut key so the software will automatically switch to Quick Mask mode. Use Brush on the lips

Step 3:
After finishing painting, click on the original icon (or press Q) to set the selection. Here, besides the lips selection, the selection also includes the entire photo. Then press Ctrl + Shift + I to invert the selection. Also, press Ctrl + J to separate the selection (lips) into another layer.

Step 4:
On the lips layer, choose Image -> Adjustments -> Color Balance …

The Color Balance table appears you adjust the color to your liking, drag the red or pink to adjust the lip color for the lips.

Step 5:
On the lips layer, create a layer mask, press Ctrl + I to black out the mask. Also, select the Soft Light mode to blend color more beautifully (you can select the mode from Overlay to Vivid light to choose the most suitable colors), then reduce Opacity down to 70% so that the lipstick color can be softer.

On the mask layer, I used the brush to paint on the selected lips, you can reduce the opacity a bit if you see the color is a bit dark.
Step 6:
Create a Curves layer, increase the brightness level a bit, then create a mask for this layer and highlight it by pressing Ctrl + I.

On the Mask layer, use the brush to paint white on the light parts in the lips so that the lips become shiny and lighter.

Result:

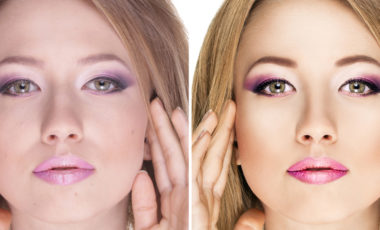
After just a few basic steps, we have created a fresh lipstick for this girl simply and perfectly right: D: D.
See the result!
YOU MIGHT ALSO LIKE...
How To Use Ghost Mannequin Photography Effects For Clothing
If you’re in the apparel business, you’ve faced the challenge of demonstrating a product’s fit without breaking the bank or distracting your customer. Customers need…
How to Whiten Teeth in Photoshop?
In this tutorial, we will learn basic steps to whiten teeth. Using Pen tool with Color Balance and Levels, you will have a perfect picture.…
Why should you choose the professional photo retouching services?
Retouch, the word you may hear so many times in today photography on your TV, magazines, or people around you. But have you ever try to…

10 amazing online photo editor apps
With the need for basic image editing, the following apps will please you. If you just need to edit some simple things, using professional programs…
Recent Post

How To Use Ghost Mannequin Photography Effects For Clothing
Posted on November 15, 2017

How to Whiten Teeth in Photoshop?
Posted on November 4, 2017

Why should you choose the professional photo retouching services?
Posted on September 13, 2017

10 amazing online photo editor apps
Posted on September 13, 2017

Top ten well-known photographers in the world
Posted on September 12, 2017
Leave a Reply