TIPS: 8 tips to capture high-quality photos by smartphone

When it comes to running a business, product image is always the important factor for any stores. However, not every shop owner can invest in a photo studio with expensive equipment. One of the current trends the shop owners select is to use smartphones as professional product photography. Its sounds a bit crazy, but with today’s advances in technology, we will guide you learn how to take beautiful photos just by your smartphone.
ARE YOU READY?
Select a smartphone as a camera
Nowadays, on the market, there are many types of different smartphone with great camera. The line of smartphone using the high-end Android operating system has relatively full-featured tool interface with pre-installed effects like a semi-professional camera. You just select the desired effect and press the button.
The most popular and simplest type of the phone’s camera is the iPhone. The iPhone’s camera has an extremely simple interface, but the image is always processed automatically by the professional algorithm system.

You can choose the phone according to your needs. In general, to be able to take beautiful photos, you should choose midrange phones or more having image resolution is 8-12 megapixel camera on the back, AF assist of image and the best light balance to ensure that after taking the picture, products do not meet some basic errors such as burst, blur, lack of light.
Make sure your camera lens is always clean
After selecting a good phone, make sure your phone is always kept carefully and clean. Not only does it use to take pictures, but it also performs many other functions such as listening, calling, playing games, surfing the web anytime, anywhere. Normally,the camera on the back of your smartphone is very small and easy to grip dust, fingerprints … So clean your camera with a soft cloth before taking product pictures to avoid scratching. The clean lens ensures that the water image you take will be clear and beautiful.
Taking product photo in good light condition.
Light is an important condition when taking pictures by phone. There are two basic light sources: natural light (sunlight) and artificial light (electric light). If you just raise your phone up and take a picture, it is very simple, but in case, you want to take a good product picture and take all angles of a product, you should notice some problems following:
Choose “golden” hour to take a photo of a product: Natural light is always the ideal condition for taking photos. The time between 8 am – 10 am to 3 pm – 5 pm (avoid high sunlight) is the best time to have the most beautiful photos.
Measuring the brightness on the product: The smartphone’s camera will help you to focusing when you touch in the screen as well as measuring the brightness of the subject. You can touch many different light / dark areas and choose a point that will help product be clear and not glare.
Don’t take backlit photography:
Absolutely don’t take the picture when the light source behind the product. Any backlight photography can cause your product to be in contrast and dark colour.
Do not shoot in the environment lacking light: Lack of lighting will make the product color not be displayed correctly. Taking advantage of artificial light: In case, you have no natural light, you can use the electric light to take pictures, but to ensure that there still has enough brightness to keep your images not being blurry.

A small suggestion is if you want to take a good and professional product images like on e-commerce sites (products with a completely white background), you can invest a “Product Photo Box”. It, a square box with size 60x60x60cm, is wrapped by a thin white fabric around and lightened in a variety of corners. The cost for product photo boxes is about eight hundred thousand to two million, depending on the quality and related equipment. You can easily find this equipment in stores related to photography.
Arranging suitable background
How to choose a suitable background? Try these suggestions below:
Use the product photo box (or studio box/ folder): Using studio box to have pictures with the white background that are often recommended when you take pictures of products with small sizes such as watches, eyewear or cosmetics.
Choose a solid background color: apart from the basic white colour, you can choose a variety of different colors to highlight the product, you are able to choose the contrasting colors like black – white, blue – yellow…
Choose natural backgrounds: Scenes are close to life or a context is randomly arranged such as a wall, wooden floor, sky, garden, street, etc. will cause your product pictures become more active and attractive. For example, if you want to shoot a Lookbook, you can choose the scene of the street to shoot to create the expansion of space.
Or if you want to take a picture of jewelry, you can hang it up or use other objects to decorate, so your image will not be monotonous. However, you should keep in mind the items to make background should not have too much detail. If the background is too much detail, you can blur which is unnecessary before shooting.
Choose the right image layout when taking product photos
When raising the phone up, not everyone can choose the frame to follow the suitable layout, so that the subject needing shooting become highlighted or impressive. You should pay the attention to the following issues in order to have a layout you like:
Arrange your product prominently.
It is recommended that just put 5 different objects in the same frame.
The layout follows the “golden ratio 1:3”
Create when taking pictures to get the most natural frames.
The principle of golden ratio 1:3 is the way of the frame is divided into 9 equal parts with two pairs of horizontal and vertical lines cutting the frame at regular intervals. Some lines of smartphone now support the grid lines under this ratio when taking pictures.
If the product is in the middle of the frame, it will increase the focus, but lack the essential depth, especially for product images having the appearance of humans. So when applying the “golden rule 1:3”, placing the subject at the intersection between the 4 straight lines, it will give you a more expressive image.
When you become a master with the basic principle, be free to create the most attractive product pictures without following the original rigid rules.
Find a suitable camera angle
When you have a sensible layout, you will sometimes get the best camera angle for products. Just move slightly the position of your hands, you will get sometimes a surprising angle. With the mobility of the phone, you can easily change many shooting angles:
The horizontal angle of view from your eyes: The most natural angle is the angle of view from your eyes. This angle will help your customers focus completely on the product.
The angle of view from the top to down or from the bottom to up: These two angles can help customers visualize the whole of product in both image and color. This shooting angle is usually applied when taking pictures of clothing.
The diagonal angle of view of products: shooting diagonally product will create a new feeling, the random and depth for your image, help customers sees the whole of the product. This shooting angle is usually applied when shooting fashion accessories or footwear.
Taking close-up pictures of your product: Macro mode (close-up) will help you get an acute angle of the product and make viewers delighted. In case your phone does not support this function, you can buy additional lenses to attach to your camera in the front. This mode is suitable for products with high sophistication and details such as jewelry, watches…
Each camera angle will bring new experiences to your product image, sometimes watching over and over again with a single shot that makes the customer feel bored. Do not be afraid to change the image to attract more customers.
Focusing and holding your phone firmly while shooting
Focusing is a simple step to take a picture of your product with your phone, just touch the shutter button to focus and press the button to take the picture as normal. Because the phone is extremely light and thin, so it is more difficult when shooting than the camera, making your hands shake easily, thereby it affects the image quality. Although most high-end smartphones now have optical image stabilization support, they usually only support vibration-damping around you, such as when traveling on a boat, a car… To be sure, you should:
Hold the phone firmly, press the button and hold the camera for 3-5 seconds
Set timer (2s, 5s) to limit the shaking.
In case, you have a good condition, you can buy a camera tripod to place the phone.

When everything is ready, you just need to press the button to save. Note that when taking product pictures, you should take multiple pictures at the same time to select the best image.
Learn how to use photo editing apps
Smartphones consist of a few photo editing tools, but there are some limitations. You can find the photo editing software from simple to complex by accessing the free app store on Android (Google Play), iOS (Appstore) and Windows Phone (Window store).
Outsourcing
If you want to improve your product image, you can send your image off to a professional outsourcing company who can really make your image shine. We are here! At Rephotosolution, we professionally edit your product photos by background removal, Clipping path, Re-Sizing , Color correction, Add or remove shadow, Drop shadow, Reflection shadow, Adjust lighting/ Contrast, Object removing, Recolor or color balance, Black and white Photos ….. services for any e-commerce store or marketplace you are selling on.
You only have to take 24 hours to receive your product with the absolute satisfaction and help you sell more products.
Let’s try !
YOU MIGHT ALSO LIKE...
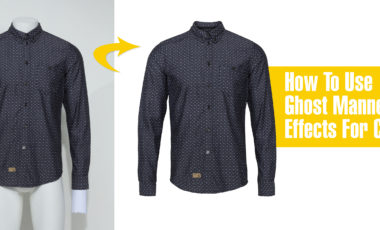
How To Use Ghost Mannequin Photography Effects For Clothing
If you’re in the apparel business, you’ve faced the challenge of demonstrating a product’s fit without breaking the bank or distracting your customer. Customers need…
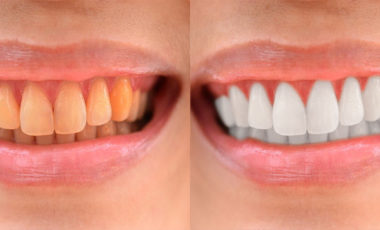
How to Whiten Teeth in Photoshop?
In this tutorial, we will learn basic steps to whiten teeth. Using Pen tool with Color Balance and Levels, you will have a perfect picture.…
Why should you choose the professional photo retouching services?
Retouch, the word you may hear so many times in today photography on your TV, magazines, or people around you. But have you ever try to…

10 amazing online photo editor apps
With the need for basic image editing, the following apps will please you. If you just need to edit some simple things, using professional programs…
Recent Post

How To Use Ghost Mannequin Photography Effects For Clothing
Posted on November 15, 2017

How to Whiten Teeth in Photoshop?
Posted on November 4, 2017

Why should you choose the professional photo retouching services?
Posted on September 13, 2017

10 amazing online photo editor apps
Posted on September 13, 2017

Top ten well-known photographers in the world
Posted on September 12, 2017
Leave a Reply